


 Zubař W.A. Price: Výživa a fyzická degenerace")
 KUCHAŘKA/Vyživující tradice: Kuchařka, která je výzvou pro politicky korektní výživu a diktátory ve stravování")
 Kniha o miminkách a dětech a jak o ně pečovat (česky)")
 Čtvero cest k uzdravení NOVINKA")
 Kuchařka pro děti - NOVINKA")

")

")
")

")
 BLUE ICE™ TEKUTÝ")
 značky BLUE ICE™")
 Zubař W.A. Price: Výživa a fyzická degenerace")
 Zubař W.A. Price: Výživa a fyzická degenerace")
 KUCHAŘKA/Vyživující tradice: Kuchařka, která je výzvou pro politicky korektní výživu a diktátory ve stravování")
 KUCHAŘKA/Vyživující tradice: Kuchařka, která je výzvou pro politicky korektní výživu a diktátory ve stravování")
 Kniha o miminkách a dětech a jak o ně pečovat (česky)")
 Kniha o miminkách a dětech a jak o ně pečovat (česky)")
 Čtvero cest k uzdravení NOVINKA")
 Čtvero cest k uzdravení NOVINKA")
 Kuchařka pro děti - NOVINKA")
 Kuchařka pro děti - NOVINKA")

")
")

")
")
 BLUE ICE™ TEKUTÝ")
 BLUE ICE™ TEKUTÝ")
")
 značky BLUE ICE™")
 značky BLUE ICE™")


")


Tvrdost
TECHNICKÁ ČÁST
Tvrdost (referát Petera Vida)
| Obsah Úvodní poznámky Formální referát Další poznámky |
|
Úvodní poznámky
(Peter Vido)
Ve většině kultur, kde byla kdysi kosa hlavním nástrojem pro sklizeň, o ní stále ještě ve venkovských oblastech slýcháváme axiomy, které odkazují na důležitost naklepávání (tvarování ostří kladívkem). Například že" Naklepání je pro kosu jako chleba pro sekáče" nebo "Jak si kdo při naklepávání spí, tak se také probudí při kosení."
Navíc jsou určité odkazy učiněny směrem ke ke skutečnosti, že až po několika naklepáních (obvykle 3-5) se nová kosa činí, "jak by měla". Jeden z důvodů, myslím, je, že velmi málo lidí si připraví ostří pečlivě a pořádně, jak by měli před prvním klepáním. Jinde vysvětlím, proč vede to, že tak nečiník početným prasklinkám podél ostří. Některé jsou viditelné pouhým okem, jiné jsou mikroskopické. Brusný kámen je některé odstraní při prvních 3-4 hodinách používání, zatímo seriozní sekáč by si znovu ostří naklepal- tentokráte s ménším počtem viditelncýh prasklin, a proces pokračuje.
Zadruhé mnoho kos v minulosti nepřicházely z továrny tak dobře před-naklepané, jako jsou některé (byť rozhodně ne všechny) dnes. Chce to značné množství času a trpělivosti například připravit ruskou kosu ke kosení. Dnes mnoho sekáčů, kteří by si takovou kosu koupili, by tento proces urychlili použitím pilníku a pak by následovalo kladivo na již ztenčenou hranu..
Jenže existuje další důvod pro klepání, kterému staří sekáči rozumněli a věda o metalurgii může opodstatnit.
AKaždý, kdo má dost zkušeností s naklepáváním novým a použitých kos – zvláště má-li kdo možnost je střídat- si všimne, že v porovnání se starou, se nová naklepává jako máslo. Již při druhém klepání všímavý sekáč pocítí značný rozdíl v tvrdosti. Rozdíl je menší v každém z následujících naklepáních, ale jak přesně to postupuje či dosahuje mazima, není poněkud jasné.
Léta jsem se ptal všech, co se zmiňovala o ztvrdňujícím účinku “Jak moc tvrdší?” Odpovědí byl buď prázdný pohled nebo (Opravdu nevím) Ani v průmyslu výroby kos jsem nenašel nikoho s přesnými čísly. Jednoduše je nemají. Žádné testování naklepané oblasti (primárního zkosení) nebylo učiněno, částečně proto, že to chce sofistikované vybavení k testování úzkého kovu.
Každá továrna na kosy sice má testovač tvrdosti (Rockwellů), ale tyto nejsou ani tak přesné, aby otestovaly hlavní tělo některých extrémně lehkých starých kos. Většina z nich byla přenastavena, tkaže místo běžných 150 lb., používají polovinu síly a výsledky jsou pak přepočítány, aby ukazovaly klasickou stupnici.
Většina výrobců tvrdí, že kalí své kosy na 45-47 Rc. (at 150 lb.), třebaže jsem mnoho vzorků z různých zdrojů testoval a měli méně, občas až 40 Rc. ČIním tak hlavně v obci Rossleithen (kosy Styria/Fux blades opravdu odpovídají standardu, mimochodem.)
Před několika lety dr. J. C. Thornley z Rady pro výzkum a produktivitu pro mě otestoval několik kos v jejich velice dobře vybavené metallurgické labolatoři v obci Fredericton v Kanadě. Většinou činí zkoušku tvrdosti podle Vickerse a je to určitě časově náročnější než test zkouška tvrdosti podle Rockwella. Tehdy jsme nezkusili žádné ostří, ale v roce 2004 jsem ho oslovil s poněkud náročným úkolem. Zpráva je prezentována níže.
Formal Report
The following is a web version of the report.
You can also download the Orginal Report (PDF document )

Výsledky některých testů tvrdosti kladívkem naklepaného ostří kosy
Vyhotoveno pro: Pan Peter Vido
Vyhotovil: Dr. J.C. Thornley
Oddělení fyzikální metalurgie
Č. zprávy.: PM/05/Scythe
Datum: 25. ledna 2005
JCT/cj
1.0 ÚVOD
This short report is concerned with measuring the hardness close to the cutting edge of a scythe blade that has been sharpened by controlled hammering of the steel close to the blade edge. This hammering thins the steel locally close to that working edge, thus making, or helping to make, a cutting edge. At the same time it is quite clear that the steel will be cold worked in this region and this would be expected to result in some local work hardening. The extent of this work hardening was not known and the work described here was performed as a first step in determining the extent, if any, of any hardness increase resulting from hammer sharpening.
2.0 SCYTHES AND TEST PROCEDURE
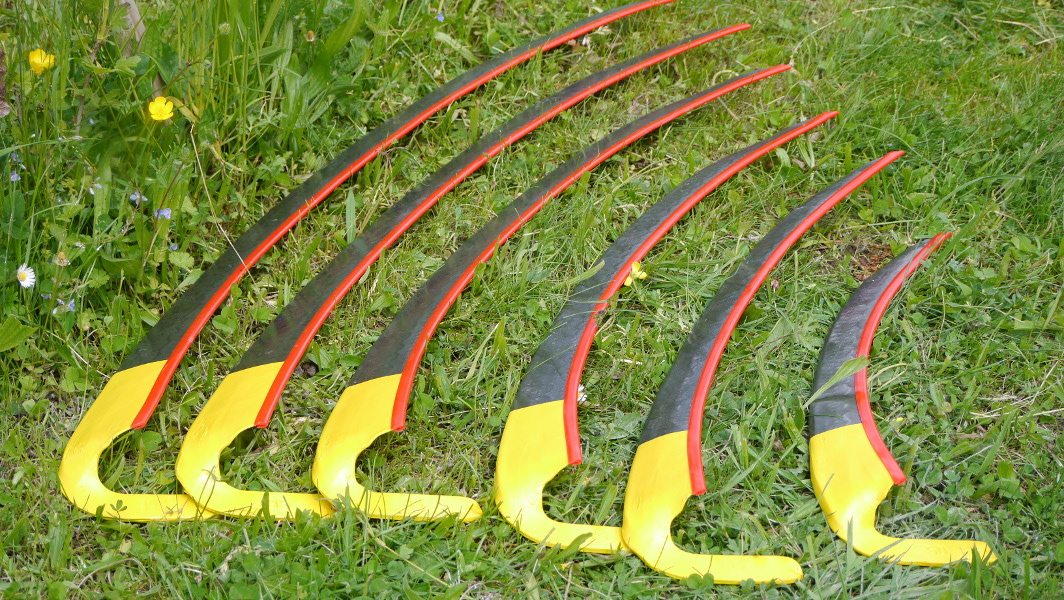
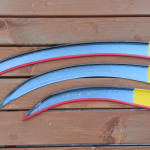
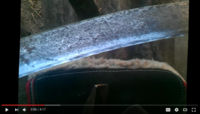
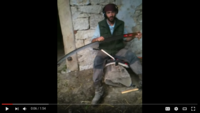
The blades for testing were provided by Mr. Peter Vido and are shown in Figure 1 below.
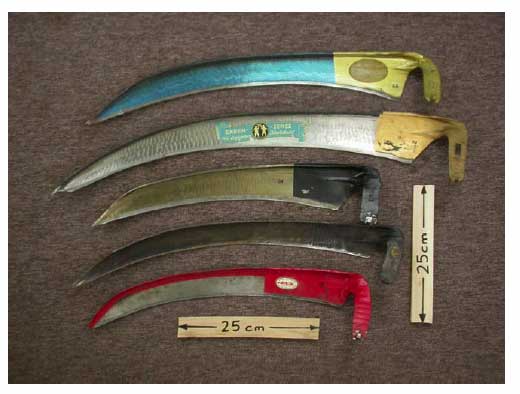 Figure 1. The blades are numbered 1 to 5 from top to bottom in this photograph. The uppermost one is of contemporary Slovenian production. Blade #2 is a pre-war Austrian blade and #3 is also Austrian but of 1950's vintage. The all dark blade, #4, is Turkish and perhaps 30 or 40 years old while blade #5 is of current Chinese production.
|
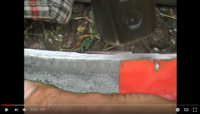
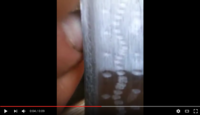
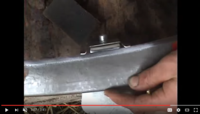
Two methods were tried for determining the hardness close to the blades cutting edge. One method was to measure the hardness directly by making Vickers diamond pyramid hardness impressions close to and remote from the cutting edge. The other was to cut sections from the blade edge and then to prepare these sections and use a microhardness testing machine to measure the hardnesses. Of these two methods only the second one produced reliable results and only the results from this testing method will be presented here. A disadvantage of using this procedure is that pieces have to be cut out of the blade, causing damage to the blade. This damage can be relatively minor or can make the blade unusable. Only one blade was tested this way in this instance. Three sections were cut out of the #1 blade. As it says in the caption to Figure 1 this blade was a current Slovenian blade. It had been factory hammered three times with additional hand hammering over about three inches (about 7 or 8 cm) close to the heel. The positions at which sections were taken from the blade are shown in Figure 2.
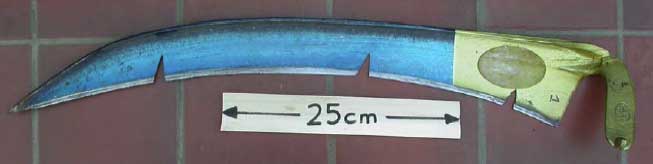 Figure 2. The three notches in the blade were made by cutting small samples out of the blade for hardness testing. Each sample was set in plastic to show the cross section of the cutting edge and was then polished, finishing with 1 µm diamond paste. The hardness impressions were then made on these prepared sections. The sections were numbered 1, 2 and 3 going away from the heel of the blade that is, right to the left in the photograph.
|
The average hardness in the "core" of the blade, at all three section positions, was about 430 Vickers diamond pyramid number (VHN). This corresponds to a hardness of about 44 Rockwell C. (A 10 kg load was first used for this core hardness testing.) The core hardness was also measured using a microhardness testing machine. The result from this testing was about 460 VHN, corresponding to about 46 Rockwell C, in reasonable agreement with the Vickers macrohardness results. Microhardness tests were then made closer to the cutting edge. These tests showed that the hardness increased only very slightly in the sections taken from the positions which had simply been factory hammered but there was a modest hardness increase, to about 560 VHN (53 Rockwell C), in the region that had been hand hammered. (The hardness close to the cutting edge was only measured by a microhardness method.) These results are shown graphically below in Figures 3 and 4 and the hardness positions are shown in a separate sketch.
 Figure 3. Test results from sample #1. The graph shows the results from near the heel of the scythe (section 1). In it, note the modest rise in hardness at positions within 3 mm of the blade edge. (The blade edge is the "0" position on the graph.)
|
 Figures 4. Test results from sample #1. The graph gives the results from the two samples taken away from the heel. (See figure 2 for the position of these samples.) There is little change in hardness at these positions as the blade edge is approached.
|
 Figure 5. This sketch shows the typical positions at which hardness impressions were taken.
|
3.0 CONCLUSIONS
The hardness testing did not show a major degree of work hardening towards the hammered edge of the scythe blades. In the case of the two sections taken through factory hammered edges the degree of work hardening was little or none. In the case of the single section taken though a hand hammered edge there was an indication that the hardness had increased by about 10 to 20% close to the working edge of the blade.
Further Comments (PV)
Although Dr. Thornley refers to the increase in hardness as modest, I consider it actually rather significant, and higher than I expected. Remember, this was after the first peening (by hand).
Most hand saws and axes were traditionally tempered to approximately 45 Rc. If the makers could have hardened them further without sacrificing their "toughness" (ability to withstand damage), they would have. At that level of hardness each 10% increase was a respectable accomplishment. Secondly, the test did not include the last 1mm or even 1/2mm--the zone which actually does the cutting and determines retention of keenness. That portion I (and my technician friends in Austria) suspect ends up considerably harder. Yet at the same time, any experienced mower who has been peening well knows that the edge retains all the toughness it really needs.
Some may wonder why no significant difference in hardness was noted between the factory-peened edge and the main body of the blade. This is because the manufacturer's peening is designed to make the steel "flow" more than "pack" (affected by the sequence of blows and the shape of the hammering "kern".) The traditional process packs the metal more in relation to how little it is moved. Of course, not every hand peening method will have exactly the same effect.
While writing The Principles of Sharpening , I deliberately chose terminology which would emphasize the re-shaping of the edge; i.e. the flattening of its underside. By the time this has been accomplished the edge was made thinner automatically. This is, of course, a recipe for general purpose rather than competition mowing. When people think about "drawing the edge out" they often overdo the job by starting too far back and not really finishing the last half-millimetre; thus they make the edge too weak overall yet with a slight roundness--a miniscule secondary bevel remaining. (More on this subject in "Sharpening Principles".)
